If you’ve just picked up Overwatch 2 or you’re dusting off your account after some time away, you’ve probably noticed a certain robotic companion hanging around Ashe’s side. Meet Bob, Ashe’s ultimate ability and one of the most unique mechanics in the game. Unlike traditional ultimates that grant temporary buffs or unleash a flurry of attacks, Bob in Overwatch 2 is an autonomous AI that fights independently alongside your team. He’s not just flavor: Bob is a legitimate threat that can turn teamfights around when deployed strategically. Whether you’re learning the ropes as a newcomer or optimizing your gameplay as a returning player, understanding how to leverage Bob effectively is essential to climbing the ranks and dominating matches.
Table of Contents
ToggleKey Takeaways
- Bob is an autonomous AI-controlled ultimate ability for Ashe in Overwatch 2 that charges into enemies independently, dealing consistent damage and drawing aggression to create opportunities for your team.
- Effective Bob deployment requires safe positioning, strategic timing around objective fights, and team coordination to maximize his value as a fight-starter rather than a solo threat.
- Bob’s effectiveness depends on map control and matchups—he excels at breaking defensive positions but struggles against hard counters like Sombra, Roadhog, Reinhardt, and Mei that can disable or neutralize him.
- Understanding ultimate economy, avoiding wasted deployments, and pairing Bob with coordinated team ultimates separates high-level Ashe players from average ones in competitive play.
- Common mistakes include deploying Bob defensively, ignoring enemy positioning, activating him into hard counters, and failing to anticipate his AI pathing toward objectives and threats.
Who Is Bob?
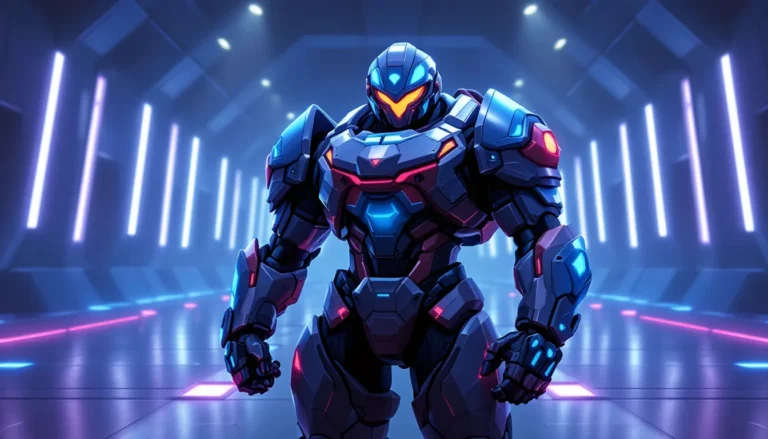
Bob isn’t Ashe’s pet in the traditional sense, he’s her bodyguard, her muscle, and her on-field enforcer. As Ashe’s ultimate ability in Overwatch 2, Bob spawns as an AI-controlled tank-like hero who fights independently on the battlefield. He charges forward with his gun raised, dealing damage to enemies and drawing fire with his sizeable health pool. When Bob deploys, he doesn’t just sit idle, he actively hunts enemies and tries to position himself for maximum impact.
What makes Bob special is that he operates on his own logic. You don’t control his every movement like a traditional ability: instead, Bob follows AI pathing and prioritizes targets somewhat independently. This dual nature, part deployed mechanic, part autonomous ally, makes Bob fundamentally different from other ultimates in the game. He’s persistent, he’s tanky, and he can absolutely wreck an unprepared enemy team.
Bob was introduced as Ashe’s defining ability back in Overwatch‘s original release, and he’s remained a core part of her kit through Overwatch 2’s transition. His balance has been adjusted numerous times through patches, but his core identity, a temporary ally that provides both damage and presence, has stayed constant.
Bob’s Role and Playstyle
Abilities and Ultimate Explained
Bob activates through Ashe’s ultimate ability, which charges over time as you deal damage with her primary weapon and dynamite. Once activated, Bob spawns slightly ahead of Ashe’s position and charges into enemy territory with aggressive AI behavior. He’s equipped with an assault rifle that deals consistent damage to enemies he encounters.
Key mechanics of Bob’s deployment:
- Autonomous movement: Bob doesn’t wait for your input, he advances toward enemies automatically
- Health pool: Bob has 1,200 HP (as of Overwatch 2’s latest balance patches), making him surprisingly durable
- Damage output: His assault rifle deals damage that scales with distance and accuracy, though his shots are generally less precise than Ashe’s hitscan weapon
- Duration: Bob remains active for approximately 10 seconds before disappearing
- Persistence: Bob can’t be permanently killed during his deployment, if defeated, he respawns at a distance and continues attacking
The ultimate ability charges faster than many other ultimates in Overwatch 2. A well-played Ashe who lands shots consistently can have Bob ready for teamfights roughly every minute of combat.
Damage Output and Effectiveness
Bob’s damage isn’t astronomical compared to ultimate abilities like Zarya’s Graviton Surge or Genji’s Dragonblade, but that’s not his primary strength. Instead, Bob excels at consistent, sustained damage combined with map pressure and presence. He forces enemies to respect his positioning and react to his aggression.
In raw numbers:
- Bob deals approximately 50 damage per shot with his rifle
- His rate of fire is moderate, allowing for steady DPS without being overwhelming
- His primary value comes from drawing attention, blocking chokes, and dealing unavoidable damage during critical moments
What amplifies Bob’s effectiveness is his durability. Unlike a Tracer or Genji ultimate that demands precise aiming, Bob simply exists on the field and forces enemies to either:
- Deal with him directly (wasting resources and positioning)
- Ignore him (and take chip damage plus disruption)
- Fall back and concede ground
This makes Bob particularly valuable in scenarios where your team needs to crack open a defensive position or secure space during an objective fight.
Bob’s Strengths and Weaknesses
When to Pick Bob
Ashe, and hence Bob, shines in specific situations. Understanding when to prioritize Ashe picks (and so when you’ll have Bob available) is crucial.
Optimal scenarios for Bob:
- Breaking held positions: Bob charges through chokepoints and forces defenders to respond, creating openings for your teammates
- Mid-range brawls: When teamfights occur at medium distances (not point-blank), Bob’s damage and durability provide exceptional value
- Objective contention: During capture point fights or payload skirmishes, Bob’s presence can secure crucial space
- Forcing cooldowns: Opponents must use defensive abilities or mobility to escape Bob’s pressure, which can bait out Tracer recalls, Reaper wraiths, or D.Va defense matrices
In map control scenarios, Bob functions as a secondary tank that doesn’t require your constant attention. This frees Ashe to position for shots without worrying about immediate survival, since Bob draws aggression.
Matchups and Counters
Bob isn’t invincible. Several heroes can neutralize or counter his presence effectively:
Bob’s hardest counters:
- Reinhardt: His Charge ability can lock down Bob immediately, and his hammer prevents Bob from advancing through a barrier
- Roadhog: A well-timed Hook pulls Bob into unfavorable positioning or toward the enemy team, essentially neutralizing his effectiveness
- Sombra: Hack disables Bob entirely, preventing him from attacking or moving. A Sombra on the enemy team significantly reduces Bob’s impact
- Mei: Her freeze ability locks Bob down, and her wall can separate him from your team or block his advancement
- Ana: Sleep dart removes Bob from the fight temporarily: anti-heal grenade prevents Bob from being pocket-healed
Moderate threats to Bob:
- Widowmaker: Her high burst damage threatens both Ashe and Bob from range
- Genji: Deflect can turn Bob’s own shots against him, though the interaction is time-sensitive
- Orisa: Her pull or javelin can disrupt Bob’s positioning
Matches where you’re facing multiple hard counters should signal caution about relying on Ashe. Sometimes a different DPS pick is strategically stronger.
Map Positioning and Strategy
Best Positioning Techniques
Deploying Bob effectively isn’t just about having ultimate charge, it’s about timing and positioning. The location where you activate Bob’s ultimate dramatically changes his impact.
Positioning principles:
- Deploy from safe distance: Activate Bob when you’re not in immediate danger. Popping ultimate while getting shot is wasteful: position safely first
- Target high-value areas: Spawn Bob toward enemy defensive positions, choke points, or grouped enemies rather than scattered opponents
- Consider Bob’s path: The AI will charge toward the nearest threat or objective. Anticipate where he’ll go and position your team to support his advance
- Support Bob’s push: Don’t deploy Bob and ignore him. Position where you can follow up with your own shots and capitalize on the chaos he creates
- Use cover strategically: After deploying Bob, position yourself behind cover where enemies can’t farm ultimate charge off you while they deal with Bob
On maps like Numbani or King’s Row, deploying Bob around corners where he can charge directly toward grouped enemies maximizes his impact. On more open maps, Bob’s effectiveness drops somewhat because he has less of a forcing effect.
Team Coordination Tips
Bob’s value multiplies when your team coordinates around his deployment:
Coordination strategies:
- Call his deployment: Alert your team when Bob is about to spawn so teammates position to capitalize on the chaos
- Secondary engage: Use Bob as your primary engage tool. Have your off-tank and DPS follow his charge to secure the fight
- Collapse while enemy is distracted: As the opponent team focuses on Bob, your team should advance and take advantage of divided attention
- Protect Ashe: With Bob handling aggression, your team (particularly your main tank and support) should prioritize keeping Ashe alive to continue dealing damage
- Timing in final fights: Save Bob for crucial moments, final teamfights on point or during pivotal rounds, rather than using him whenever he’s available
Teams that understand Bob’s role as a fight-starter rather than a finisher gain tremendous value. He opens doors: your team walks through.
Advanced Tips and Tricks for Mastering Bob
Ultimate Economy and Resource Management
Mastering Bob at a higher level means understanding ultimate economy and maximizing the value you extract from each Bob deployment.
Advanced resource management:
- Charge tracking: Monitor how quickly you’re charging ultimate versus enemy ultimates. If you’re charging faster, you have a tempo advantage
- Bait and switch: Sometimes the threat of Bob is enough. If enemies are playing around potential Bob deployment, you can use that psychological pressure without actually spending ultimate
- Pair with other ultimates: Coordinate Bob with your team’s other ultimates. A Bob deployed alongside Zarya’s Graviton Surge or Reinhardt’s Earthshatter creates overwhelming pressure
- Avoid wasting ultimates: Don’t deploy Bob when your team is already losing the fight or too spread out to capitalize. A wasted Bob is essentially a free teamfight for the enemy
- Meter management: Track your ult percentage at all times. If you’re at 99% charge and a teamfight is imminent, try to get that final damage tick before engaging
One subtle but powerful technique: delay aggressive plays when Bob is nearly charged. Let opponents think you’re passive, then suddenly deploy and turn the tide. The tempo shift catches teams off-guard.
Common Mistakes to Avoid
Even experienced Ashe players make preventable Bob errors:
Mistakes to eliminate from your play:
- Deploying defensively: Bob is not a defensive ability. Ulting to save yourself when you’re getting hunted usually backfires, use positioning instead
- Ignoring enemy Bob: If their Ashe has Bob charged and you’re bunched up, spread out preemptively. Don’t get caught in a coordinated Bob + teamfight
- Tunnel vision after Bob: Just because Bob is fighting doesn’t mean Ashe should tunnel one target. Stay mobile and adjust positioning based on threats
- Deploying into hard counters: Activating Bob when enemy Sombra is up, or when Roadhog is in position for hook, is asking for failure
- Not anticipating Bob’s path: New Ashe players often seem surprised where Bob goes. Spend time understanding AI pathing so you can predict his movements
- Overcommitting with Bob: One Bob ult doesn’t win teamfights alone. Pair him with team plays and avoid 1v5 situations
Analyze your gameplay VODs. Look for moments where your Bob deployment didn’t generate value and ask: Was I in a bad position? Was it the wrong time? Did my team not follow up? Most Bob mistakes stem from poor timing or execution, not the ability itself. You can reference professional player settings and strategies to see how top Ashe players handle these situations.
Bob in Competitive Play
Meta Changes and Patch Updates
Bob’s strength has fluctuated throughout Overwatch 2’s competitive history. Understanding recent patches and meta shifts is essential for staying relevant.
Recent balance context:
As of 2026, Bob remains a consistent part of Ashe’s toolkit, though his viability depends heavily on the current meta. In seasons where brawly compositions dominate (teams playing at close ranges with tanky heroes), Bob shines because he can charge directly into teamfights. Conversely, when poke-heavy compositions are meta (teams fighting at range with abilities like hitscan damage), Bob sometimes struggles to reach enemies before ultimates resolve.
Competitive strength factors:
- Meta tank selection: When Reinhardt or Orisa are meta, Bob struggles more due to hard counters. When D.Va or other mobile tanks are popular, Bob finds more space
- Counterplay availability: The prevalence of Sombra in competitive play directly impacts Ashe’s viability. High Sombra play means less Bob value
- Patch damage adjustments: Any balance changes to Bob’s HP, damage, or behavior trickle down from professional play to ranked
- Ashe’s primary weapon tuning: Ashe’s gun changes indirectly affect Bob by changing how quickly she charges ultimate
To stay competitive, check gaming news and update coverage regularly. Patch notes often include subtle Bob adjustments that high-level players exploit immediately.
In professional esports, Bob is a pivotal tool for securing map control. Teams like those with competitive Overwatch expertise leverage Bob for objective fights where space control determines round outcomes. Watch pro matches to see how optimal Bob positioning differs from ladder play, pros deploy earlier, coordinate harder, and extract maximum value from each ultimate.
Competitive players also understand the psychological aspect of Bob. The threat of an incoming Bob forces positional changes, cooldown spending, and strategic adjustments. Sometimes the value isn’t in Bob’s damage, but in how opponents prepare to counter him.
Conclusion
Bob in Overwatch 2 represents a unique design space, an autonomous ally that adds strategic depth while remaining straightforward to understand. He’s not the flashiest ultimate, but he’s consistently valuable when deployed with intention and team coordination.
Success with Bob boils down to three core principles: positioning, timing, and team play. Master your positioning to deploy safely, understand the timing windows where Bob provides maximum value, and always coordinate with teammates to capitalize on his presence. Avoid hard counters, respect dangerous matchups, and refine your ultimate economy through ranked grinding and VOD review.
Whether you’re climbing out of lower ranks or grinding toward competitive, Bob will be a crucial asset in your Ashe arsenal. The heroes who master both Ashe’s mechanical skill and Bob’s tactical deployment separate themselves from average players. Keep practicing, stay aware of meta shifts, and remember that Bob is a tool for creating opportunities, not a guaranteed win condition. Use him wisely, and you’ll find yourself winning more fights and climbing steadily toward your rank goals. Now jump into a match and show Bob what you’ve learned.